Skip to product information

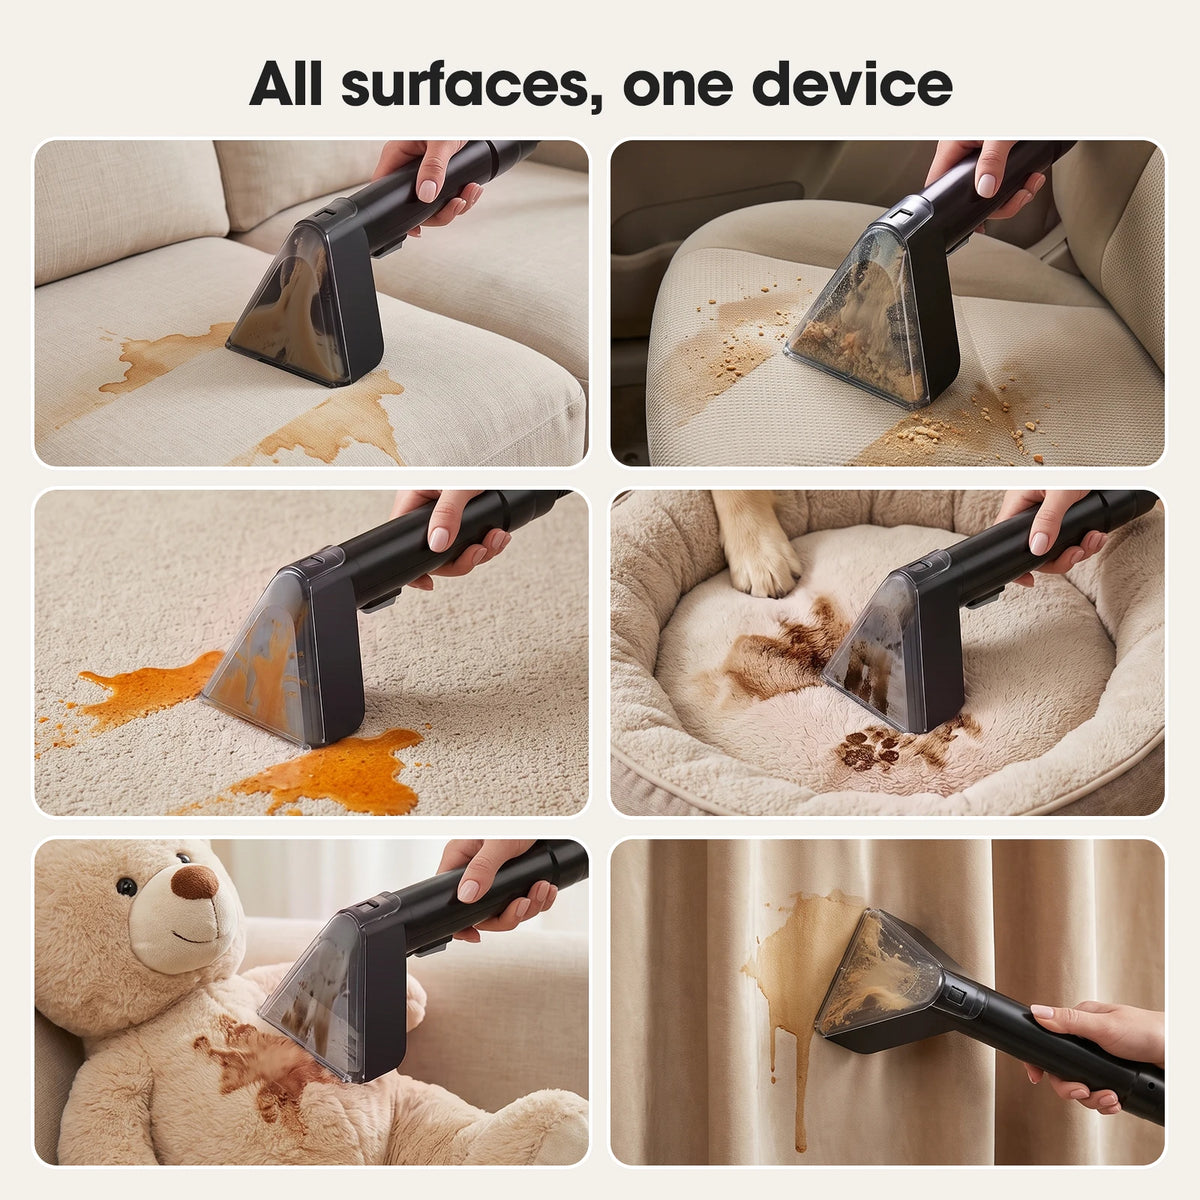
Stain Drain™ Hot Water Spot & Upholstery Cleaner

Stain Drain™ Hot Water Spot & Upholstery Cleaner

Regular price £49.99
Sale price £49.99

Help reduce light swirls and restore a clearer shineHelps reduce light swirls

Dual action for more forgiving controlDual action for easier control

Two batteries for convenient swapsTwo batteries for quick swaps

Adjustable speed for suitable polishing and waxing jobsAdjustable polishing speed

Supplied pads to use with your chosen polishPads for use with your own polish

Free tracked UK shipping, out within one working dayFree tracked UK delivery

30-day satisfaction guarantee30-day satisfaction guarantee

Order today and get it between [start_date] and [end_date].

  • Apple Pay
  • Google Pay
  • Klarna
  • Mastercard
  • PayPal
  • Shop Pay
  • Visa
Premium QualityExcellence in Every Detail
Trusted BusinessSupport before and after ordering
Express ShippingFast Delivery with No Extra Costs
Secure CheckoutSecure Payment for Peace of Mind

Full pad, speed & care guide

A good finish starts here

  • Prepare. Charge both batteries. Wash and dry the car; work on cool paint (in the shade on hot days).
  • Start gently. Start on a small area with an orange foam pad and polish.
  • Spread, then polish. Speed 1–2 to spread; 3–4 to polish. Keep the pad flat and moving with light pressure.
  • Check and protect. Switch off on the paint, wipe and inspect. Finish with wax or sealant.
Follow the 10 steps

What you'll need

  • A machine polish (also sold as a finishing polish or finishing compound) that says it suits dual-action or machine use. We suggest Farécla G10. All-in-one 'polish and wax' products remove less.
  • A cutting compound, only if a test section shows the marks need more. We suggest Farécla G3 Premium, followed by G10.
  • A wax or sealant to protect the paint afterwards.
  • Several clean microfibre cloths. Keep a fresh one for the final wipe.
  • Car shampoo, a wash mitt, two buckets and a drying towel.
  • Low-tack masking tape for rubber seals, plastic trim and badges.
  • A torch, so you can see the swirls properly.
  • A shady spot to work, and a mains socket for the charger.
  • Optional: a clay bar with clay lubricant, eye protection and gloves.

Choose your pad

Your kit has five kinds of pad. The mix can vary a little between batches, so go by what they look like. Start with the foam pads: they're the easiest to control. For more cut, change the product or the speed, not the pressure.

  • Orange foam polishing pad with a raised waffle face from the original Gloss Boss kit.

    Orange waffle foam

    Foam with a raised, waffle-pattern face. Your main working pads: use them with polish, or with compound on heavier swirls. Keep one pad for each product.

  • Orange foam polishing pad with a smooth flat face from the original Gloss Boss kit.

    Orange flat foam

    Foam with a smooth, flat face. Also working pads. Keep a clean one just for spreading wax or sealant on a low speed.

  • Blue cloth bonnet with a gathered edge and pale elastic opening from the original Gloss Boss kit.

    Blue cloth bonnets

    Soft, towel-like bonnets. For applying wax or lightly buffing the finish after polishing, on a low speed.

  • White fluffy wool bonnet with a small central opening from the original Gloss Boss kit.

    White wool bonnets

    Fluffy white bonnets that cut harder than foam, for heavier correction. Save them until you're used to the foam pads, then try one on a small hidden patch at a low speed first.

  • Thin brown abrasive sanding disc supplied with the original Gloss Boss kit.

    Brown sanding discs

    Thin, paper-like abrasive discs for specialist sanding by experienced users. Nothing in this guide needs them: see the warning below.

Sanding discs are not for polishing. They're for advanced wet-sanding prep and can take off the clear coat if used wrongly. If you're new to this, leave them in the bag, and never use them on headlights, glass, chrome, trim or rubber.

Pads worn out? Gloss Boss™ Replacement Pad Set

Set your speed

Six speed levels, set on the tool. Start low and only go up if you need to.

  • Speed 1–2

    Spreading polish before you work it in, applying wax or sealant, and buffing off with a clean blue bonnet.

  • Speed 3–4

    Most polishing. This is where you'll spend most of your time.

  • Speed 5–6

    Cutting with a compound on heavier swirls, once a test patch shows you need it. Light pressure, keep moving, stay off edges.

Step by step

  1. Step 1: Charge both batteries

    Charge both batteries fully on the supplied UK mains charger before your first session, indoors and somewhere dry. Start the evening before, so each one gets a full charge. Plan the job panel by panel, so a battery swap falls at a clean edge.

    Keep in mind A full cut and polish on a whole car is a big job. It's fine to spread it over several sessions, a few panels at a time.

  2. Step 2: Prepare the car

    Wash and fully dry the car, then park in the shade and wait until the panels feel cool. Tape over rubber seals, plastic trim, badges and sharp edges with low-tack tape. Shine a torch across the paint to see what you're working with.

    Keep in mind Slip your hand into a thin plastic bag and stroke the paint. If it feels gritty, clay it first with a clay bar or mitt and plenty of clay lubricant.

  3. Step 3: Fit a pad

    With no battery in the tool, press an orange foam pad onto the backing plate, centred and flat, and tug the edge gently to check it's held. To change pads later, switch off, take the battery out and peel the old pad away from one edge.

    Keep in mind Give each product its own pad, so compound, polish and wax never mix.

  4. Step 4: Fit a battery

    With the switch off, slide a charged battery into the end of the handle until it sits fully home. Don't force it. It should stay in without you holding it; if it doesn't, or the tool cuts out, take it out and refit it.

    Keep in mind To take it out, press the battery's release catch and slide it straight out. The user manual shows where the catch is.

  5. Step 5: Get to know the controls

    Find the on/off switch on top of the handle, the numbered speed wheel with its six levels, and the three small lights that show how much charge is left. Check them against your user manual: this guide calls the slowest level speed 1.

    Keep in mind Keep your hands off the vent slots on the head while it's running.

  6. Step 6: Make your first section a test

    Pick a flat part of a panel, about 40 × 40cm, where you can see well. Start with your gentlest setup: an orange foam pad and polish, not compound. Only step up to compound or a higher speed if the swirls are still there after three or four rounds.

    Keep in mind Stepping up means a stronger product or a higher speed, not more pressure. You can always take more off, but you can't put lacquer back.

  7. Step 7: Spread the polish on a low speed

    On a new pad, work a little polish into its face with a clean finger first. Put three or four pea-sized drops on the pad and, with the tool off, dab the pad onto the paint in a few spots across the section. Set speed 1 or 2, rest the pad flat, switch on and spread the polish evenly.

    Keep in mind Switching on in the air flicks polish everywhere. Start and stop with the pad on the paint.

  8. Step 8: Polish with slow, overlapping passes

    Turn up to speed 3 or 4. Hold the head with one palm and the handle with the other, pad flat, pressing no harder than the weight of your hands. Move slowly, about a hand-width every couple of seconds, side to side and then up and down, overlapping each pass by about half.

    Keep in mind Watch the edge of the pad: it should keep turning, not just buzz. If it only buzzes, you're pressing too hard, so ease off.

  9. Step 9: Wipe off and check

    Switch off with the pad still on the paint, then lift it away. Wipe off the residue with a clean microfibre cloth. Check under a torch from a few angles, and do another round if you need to.

    Keep in mind One round is one set of side-to-side and up-and-down passes. Three or four rounds on a section is normal. For the next section, add two or three fresh drops and overlap the last one slightly.

  10. Step 10: Protect the paint

    Polishing corrects the paint but doesn't protect it. Spread a thin coat of wax or sealant on speed 1 with a clean flat foam pad kept for wax, or by hand. Let it haze as the product's instructions say, then buff it off with a clean microfibre cloth.

    Keep in mind Thin coats work best. More wax isn't more shine.

What to avoid

Any polisher can mark paint if it's misused. The dual-action head is gentler than a rotary polisher, and these habits lower the risk further.

  • Don't press hard. A light touch lets the pad turn and do the work.
  • Don't hold the pad still in one spot or tip it onto its edge. Keep it moving and flat.
  • Stay off sharp body lines and panel edges, where the paint is thinnest. Work around badges and rubber.
  • Don't polish in direct sun or on a warm panel. The product dries and smears.
  • Don't polish over dirt. Wash and dry first, or you'll grind it into the paint.
  • Don't polish over peeling or flaking lacquer or bare metal. It makes them worse.
  • Don't machine polish matt or satin paint, or matt wraps. It leaves shiny patches that can't be undone.
  • With resprayed paint, wraps or protection film, check with whoever applied it first. On very old paint, test a small hidden patch, and if colour comes off onto the pad, stop and get in touch.
  • Don't use the sanding discs for polishing.
  • Keep the tool, batteries and charger away from rain, buckets and hoses.

Troubleshooting

It feels like it has no power

Ease off: pressing hard stops a dual-action pad turning, so it only buzzes. Keep it flat, with just the weight of your hands, and watch that the edge keeps turning. If it's got slower as you've worked, the battery may be running low, so swap to the spare. For more cut, go up a speed or use a compound on a fresh pad, not more force.

It won't start or cuts out

Check the battery lights. If none come on, charge that battery. If they do, the battery may not be fully in: switch off, take it out, check the slot is clear and slide it back in without forcing it. If it still cuts out, try the other, fully charged battery. If it still won't run, contact us with your order number.

The battery runs down before I've finished

Higher speeds and heavy pressure use charge fastest, so keep a light touch. Charge both batteries fully before you start and work panel by panel. 

A battery won't charge

Check the charger is plugged in and switched on at the wall, and the battery is properly connected to it. Try the other battery to see whether it's the charger or the battery. If it still won't charge, contact us with your order number.

Polish flies off, dries hard or leaves haze

Use three or four pea-sized drops, and start and stop with the pad on the paint. Work in the shade on a cool panel and wipe off soon after each section. If it still looks smeary, wipe with a clean microfibre and do another light pass.

A foam pad is breaking up or has gone hard

Usually it's heat from heavy pressure, a dry or clogged pad, or staying in one spot. Keep it moving with light pressure, add a drop of product, and clean or swap pads between stages. Replace any pad that's torn or won't grip.

The swirls or a scratch are still there

Wipe the panel and check under a torch, as residue can hide the result. Do a few more light passes, then try compound if you need to. If a scratch catches your fingernail, polishing may soften it but not remove it, so don't keep going over one spot.

Aftercare

  • Switch off and take the battery out before cleaning, changing pads or putting it away.
  • Clean the pads after each session in warm water with a little mild soap, unless the manual says otherwise. Rinse, squeeze gently and let them air-dry, away from radiators.
  • Wipe the tool with a dry or barely damp cloth. Keep water away from the vents.
  • Store the pads clean and flat in the storage bag, so the foam keeps its shape.
  • Keep the batteries and charger indoors, somewhere dry and not too hot or cold.
  • Replace pads that are torn, gone hard or won't grip. Tired pads give a tired finish.

For any surface beyond suitable car paint, first check that its maker permits machine polishing. Choose a compatible pad and product, test a hidden area and keep separate pads for different jobs.

  • Gloss boost after a wash

    For clean paint that looks flat or tired. A light polish can bring back some depth and gloss. Follow steps 2 to 10.

    Pad
    Orange foam pad
    Speed
    1–2 to spread, 3–4 to polish
    Use with
    A fine polish such as Farécla G10, then wax or sealant

    Wash, dry and mask the trim first, and work on a cool panel.

  • Fine swirls and water spots

    The fine circular marks you notice in sunlight, and marks left by dried water. Start with polish and step up only if they stay.

    Pad
    Orange foam pad
    Speed
    3–4
    Use with
    Polish. Compound only if a test patch needs it

    It may take several passes. Water spots etched into the paint may not fully come out.

  • Heavier swirls and light scratches

    For marks a polish alone didn't shift. Cut with a compound first, then refine with polish on a fresh foam pad. The white wool bonnets cut harder still, once you're confident.

    Pad
    Orange foam: one for compound, a fresh one for polish
    Speed
    1–2 to spread; 3–4 with compound, 5–6 only if a test patch needs it; 3–4 to refine
    Use with
    A cutting compound such as Farécla G3 Premium, then G10, then wax

    If a scratch catches your fingernail, it may soften but not disappear. Stay off edges.

  • Waxing and sealing

    Spreads a thin, even coat of wax or sealant, one panel at a time, ready to buff off.

    Pad
    Clean flat foam pad or a blue bonnet
    Speed
    1
    Use with
    Wax, sealant or a ceramic spray, then a microfibre to buff

    Keep this pad for wax only, and follow the product's own timing.

  • Hazy headlight lenses

    Only machine-polish a headlight lens if its care instructions and your chosen restoration product permit it. Follow that product’s method, test first and protect any coating as directed. Heavy yellowing or cracking may need specialist restoration.

    Pad
    A compatible pad specified by the headlight restoration product
    Speed
    1–2 to spread, 3–4 to polish
    Use with
    Headlight polish, then a UV sealant applied as its instructions say

    Mask the paint around the lens. Light pressure and keep moving: plastic warms up faster than paint. Never use the sanding discs on a lens.

  • Metal

    Only use the machine on metal when the finish and polishing product permit it. Brushed, plated and coated finishes need particular care. Test a hidden area and keep a separate pad for metal.

    Pad
    A pad compatible with the metal and polishing product
    Speed
    1–2, then 3–4 if needed
    Use with
    A metal polish made for that metal

    Test a hidden spot first. Plated or coated metal can wear through, and chrome-effect plastic isn't metal.

  • Wood and worktops

    Check the wood or worktop maker’s care instructions before machine polishing. Only use a compatible product and pad on a finish that permits it, and test a hidden area first.

    Pad
    A clean foam pad kept for the home; a blue bonnet to buff
    Speed
    1–2
    Use with
    Wood wax or polish, or a food-safe product made for your worktop

    Check the care advice first: some surfaces shouldn't be machine polished. Keep off edges and thin veneer, test a hidden spot, and don't use it on antiques or French-polished furniture.

  • Not for: deep scratches, chips and rust

    Polishing works on the top layer of the paint. Scratches through to the primer or metal, rust and peeling lacquer need touch-up paint or a bodyshop, not more polishing.

Need a hand? Contact Verono with your order number and a photo of the issue.

Description

The car is clean, but the paint still looks dull.

Gloss Boss™ works with a suitable polish or compound to help reduce light surface marks and bring back a clearer shine.

Use the polishing guide below for your first session. The full pad, speed and care guide above covers the details, troubleshooting and other suitable surfaces.

What's Included

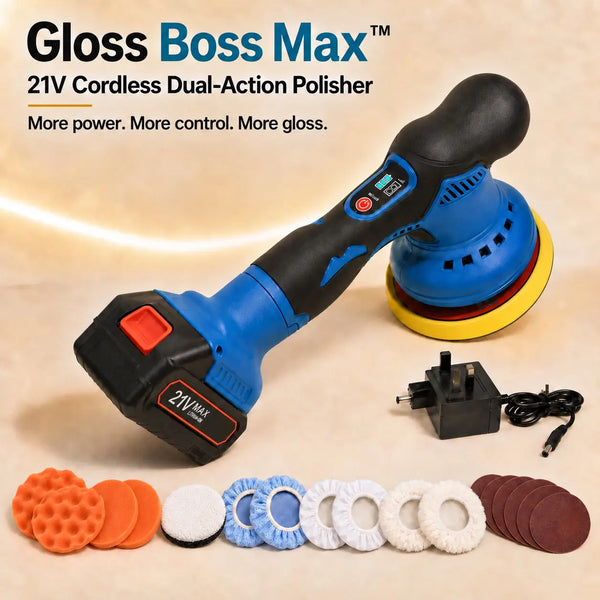
  • 1 × Gloss Boss™ cordless polisher
  • 2 × 12V rechargeable batteries
  • 1 × UK mains battery charger
  • Supplied pad and attachment set
  • 1 × storage bag
  • 1 × user manual
  • 1 × Verono 30-Day Satisfaction Guarantee

Shipping

Every order includes tracked UK delivery, so you can follow its journey.

Shipping times

  • Orders are normally processed within one working day.
  • Estimated UK delivery is 2–6 working days; courier delays can occur.
View full details

Stain Drain™ Hot Water Spot & Upholstery Cleaner

Regular price £49.99
Sale price £49.99

Your polishing guide

A confident start to polishing.

Beginner-friendly dual action helps spread heat and reduce the risk of burning paint. Good technique still matters: incorrect use can burn or damage the finish.

Select a heading below to open the details.

Easier control

How dual action helps protect your paint

The pad rotates and orbits, spreading the polishing work across the surface to help limit heat build-up. That makes Gloss Boss an approachable choice for beginners.

Keep the pad moving, use light pressure and follow the pad, polish and paint-care instructions. Dual action reduces the risk of burning paint; it does not remove it.

The finish

What to use it for on your car

Fine swirl marks and light surface marks can scatter the reflection. Use Gloss Boss with a compatible polish or compound on suitable clean, dry paint to help reduce light swirls, haze and some shallow marks.

Choose the pad and product for the finish you want. The result depends on the paint, the marks and your technique. Deep scratches, chips and failing paint need a different repair; polishing cannot put missing paint back.

Getting started

Your first polishing session, step by step

  1. Prepare the paint. Wash and dry the car. Work on cool paint.
  2. Choose and test. Start at a low speed with the least aggressive suitable pad and polish. Test a small hidden area first.
  3. Work a small section. Keep the pad flat and moving with light pressure. Follow the pad and polish instructions.
  4. Wipe and inspect. Remove residue with a suitable finishing cloth and check the result before moving on.

Ready between jobs

Two batteries and a bag to keep it together

Two 12V rechargeable batteries let you swap when needed. The included storage bag keeps the polisher and accessories together between jobs.

Before you begin

Choosing the right pad, polish and cloth

Match the pad and polishing product to your paint and the job. Follow their instructions together, and have a suitable finishing cloth ready to wipe away residue.

Suitable polish, wax or sealant and cleaning cloths are purchased separately.

Your car isn't dirty. It's dull.

A freshly washed car can still look dull when fine marks scatter the reflection. Gloss Boss™ helps you polish suitable paint at home, using a dual-action pad and your chosen polish. Start with a small test area, then work one panel at a time.

From Dull to Deep Gloss

Reveal the deeper colour and gloss hiding underneath from your own driveway.

Before
After
Before
After

Complete your Gloss Boss setup

Everything that works with it, in one place.

Add the HydroJet or replacement pads and 10% comes off your order automatically at checkout.

Your Questions, Answered!

Collapsible content

Will it work on my car?

It is intended for suitable clear-coated automotive paint in good condition. Check the paint and polish guidance, then test a small hidden area at low speed. Damaged, peeling or very thin paint needs specialist advice before polishing.

What can it actually remove?

With the right pad and polish, it can help reduce light swirls, haze, water marks and some shallow surface scratches. Results depend on the paint and the mark. It cannot repair chips, dents or scratches that have gone through the paint.

How long does a battery last?

Two batteries are included, so you can swap over and keep polishing while the other charges. Runtime and charging time vary with the speed and pressure you use, and with the charge left in the pack.

Is it suitable for beginners?

Yes, Gloss Boss is beginner-friendly. The pad rotates and orbits, spreading polishing work across the surface. This helps limit localised heat build-up and reduces the risk of burning paint. Incorrect use can still overheat, burn or damage paint. Use a suitable pad and polish, test a small area first, keep the pad flat and moving, and use light pressure. Follow the product and paint-care instructions.

Do I need polish and cloths?

Suitable polish, wax or sealant and cleaning cloths are purchased separately. Choose products suited to your paint and the job, following the guide.

Can I use it on anything else?

Only use it on another surface when the pad, polish and surface maker’s care guidance allow machine polishing. Headlights, metal, wood and worktops have different coatings and needs, so do not use the car-paint method on them automatically.

How fast is delivery?

Orders are normally processed within one working day. Estimated UK delivery is 2–6 working days. Courier delays can occur. See our shipping policy for other destinations.

What if I do not get on with it?

Your order is covered by our 30-day satisfaction guarantee. Contact us within 30 days of delivery to arrange a return, subject to our returns policy. Approved returns include free return postage. Your statutory rights are unaffected.

Dispatched within one working day

Free UK delivery

30-day satisfaction guarantee

Dispatched within one working day

Free UK delivery

30-day satisfaction guarantee

Dispatched within one working day

Free UK delivery

30-day satisfaction guarantee

Dispatched within one working day

Free UK delivery

30-day satisfaction guarantee

Dispatched within one working day

Free UK delivery

30-day satisfaction guarantee

Dispatched within one working day

Free UK delivery

30-day satisfaction guarantee

Dispatched within one working day

Free UK delivery

30-day satisfaction guarantee

Dispatched within one working day

Free UK delivery

30-day satisfaction guarantee

Dispatched within one working day

Free UK delivery

30-day satisfaction guarantee

Dispatched within one working day

Free UK delivery

30-day satisfaction guarantee

Dispatched within one working day

Free UK delivery

30-day satisfaction guarantee

Dispatched within one working day

Free UK delivery

30-day satisfaction guarantee